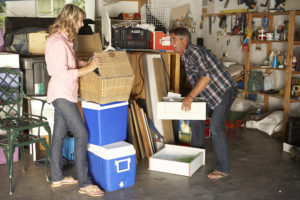
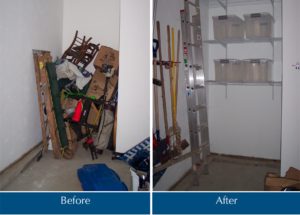
 Well, winter is over. It’s time for garage organizing. Maybe you parked your car in the garage all season, maybe not. But either way, you open the door and it looks as though some strangers came in, rifled through the contents, didn’t take anything, maybe even left a few things, but took off in a hurry! As professional organizers, we see this happen to our clients all the time! 😉
What a great time of year to organize the garage! Not too hot, not too cold, just the right time to get things in order before summer fun and vacations come along!
The garage is a funny space, not quite part of the home, but just as important for the storage of lots of good stuff. It’s usually not temperature controlled, subject to pests and cobwebs and other icky things, but it is also one of the places on your property you can make the biggest improvement in the shortest amount of time!
Things in the garage tend to be larger items that take up a good deal of space. While keeping all of the items can create a clutter spot just like any other, eliminating some can free up lots of useful real estate. Don’t look at the project as drudgery, consider this a time to get one of your homes’ most valuable storage spaces some much deserved attention and it’s so easy to accomplish!
The garage can hold a lot and things tend to get shoved and piled. So, to get started, take everything out. Clear the entire floor space. This will chase out the creepy-crawlies and give any other critters notice that you are coming through! Sweep or use your shop vacuum to get rid of leaves and other debris. Be sure to use a face mask and work goggles when you do this. Warning: Lots of dust!
Once the dust settles, go back out into the sunlight and take a good look at everything you have emptied out into your driveway. Have your heavy duty contractor bags ready and your work gloves on and start inspecting. Look for broken and unused items. Put the broken things in the trash or start specific recycling piles for items like metal, cardboard and plastic. If you have unused paint, solvents and gasoline, put those off to the side as well. Keep in mind, you only want to put back the items that you know you will use. Paint that is exposed to extreme heat and cold is no good, so don’t even open it. Check gardening items like top soil and fertilizer to be sure these items are still useable.
In order to dispose of hazardous materials like paint, gasoline, propane tanks and solvents, check with your city or town to see whether there is a disposal day or a pickup day for these items. There are usually a few days a year where the city/town offers residents the chance to dispose of these items properly. If your city or town does not offer this service, there are haul-away companies that will pick up hazardous materials and recycle them responsibly. There are also commercial companies that will take these items at their facilities for a small fee.
 Items that can be donated like old toys, outdoor tools, chair cushions, beach toys and chairs, can be either put right at your curb with a FREE sign on them or brought to donation centers. I like just walking to the end of the driveway and putting things up for grabs. They are gone in no time! Yes, shelves, bikes, rakes, sleds, beach chairs, bubbles, street chalk, sports equipment; whatever it is, someone will want it.
Check with other members of your household whether they want some of the items you find. If your children have outgrown a toy or sports item, give these things away to a neighbor child (if they are still in good condition). And don’t be tempted to keep things for maybe/someday. The leaking hose is not going to be transformed into a rose garden soaker hose and the extra lawn chairs with mildew on the seat will never be sat in!
Now take a look at what is hanging (or leaning) on the walls. Also, do you have anything up in the rafters? Assess the need for multiple rakes, shovels, snow and ice scrapers and extension cords. Do you have lots of extra wood and items from previous projects and renovations that has never been used? Think about wood trim, shingles, tiles, bags of grout and cement. Do you need these items? The answer is probably not; I have never known someone to reuse the grout from the tile project done by someone else! Truth is; you would never chance it knowing that the product has been exposed to the elements, even if you did have a use for it!
Before you start organizing the items back into your garage, think about shelving and storage. Do you have enough shelves to put items back on to? Simple, free-standing, durable plastic shelves will do the trick. Look at items stored in old, cardboard boxes and replace them with clear plastic bins. Bins are easier to clean off and minimize bugs and debris from getting inside. Do you have enough sturdy hooks so that your tools and equipment can be hung safely out of the way and not just lean against the walls?
Always use as much vertical space in your garage as possible. Hang hooks up high for the items that are long and can be easily guided onto a hook from below. Lower hooks can hold smaller, shorter items. You can hold multiple items by using long utility hooks. You can even use the ceiling for hanging bikes, kayaks, etc. If you have partial rafters, use a piece of plywood as a large shelf for lightweight items such as sleds and inner tubes.
 You can affix lots of items to the walls of your garage. If you have wooden studs, you can hang makeshift shelves like wooden crates or old, second hand cabinets. With cement walls, you can hang peg boards with cement nails. Ask your local hardware store about the proper hardware and tools you will need for these surfaces. When you have a challenge like a ledge wall that is half cement on the bottom and drywall, free standing shelves are best so that you are able to use all of the vertical area. You can use freestanding shelves to the top of your ledge wall and then hang hooks or peg board onto the drywall of the upper wall.
It’s best to use ventilated shelving to let air circulate and keep the bottom of the shelving at least a few inches off the floor for ease of cleaning and in the event of water.
Create zones in the garage space just like you would in the interior of your living space. Evaluate the items you have the most of, like sports equipment, gardening, boating, beach, winter gear, etc. Allow an area for the items that need to be “parked” (other than your car), like a snow blower, riding mower or kid’s play vehicles. It’s usually best to keep these items towards the back of the garage or seasonally as close to the door you will enter and exit with them.
On the shelves, make an area for beach and outdoor summer activities like coolers, chairs, umbrellas, beach toys and life preservers. If you live in a cold climate, then one shelf area should be dedicated to winter activities and gear like ice skates, snow melt, emergency roadside equipment, etc. Then determine what other major categories you use and put all of these like items together. While working with clients, it depends on the season when we are doing the garage organization as to what will go where initially. In the spring, we place winter items out of the way and bring them items front and center in the fall to be ready for the season. You can use this seasonal cycle to get your garage organized twice a year. If you keep this up with this frequency, it will never be a large project!
You can label your shelves and zones if that helps other family members find and put away items. Keep children’s toys, balls and sporting equipment at their level. You can use large utility hooks with a rubber grip to hang unwieldy scooters. Some clients have found that rather than hang bikes, it’s better to have a mini bike rack similar to what you would see in a public space. The bikes can remain upright and no one has to wrestle them off of higher, hanging racks.
Your satisfaction at the end of the day when this project is completed will be immense! You will be tired, but you’ll sleep well that night! And, you can look forward to opening your garage door and being the envy of the neighborhood this spring!


